Start a Podcast Without Sounding Like You're Recording in a Bathroom
Skip the expensive studio and create professional-quality podcast audio from your bedroom. Here's the gear that actually matters and the tricks that make all the difference.
Every podcasting guide starts with the same lie: “Audio quality doesn’t matter as much as content.” That’s garbage advice from people who’ve never tried to listen to a genuinely good story ruined by echo, background noise, and levels so inconsistent you need to constantly adjust your volume.
Content is king, sure, but bad audio is the fastest way to make people skip to the next podcast in their queue. The good news? Professional-sounding audio isn’t expensive or complicated. It’s about understanding which problems actually need solving and which gear investments make the biggest difference.
Most people overthink the technical side and underthink the acoustic side. You don’t need a $5,000 mixing board, but you absolutely need to control the space you’re recording in.
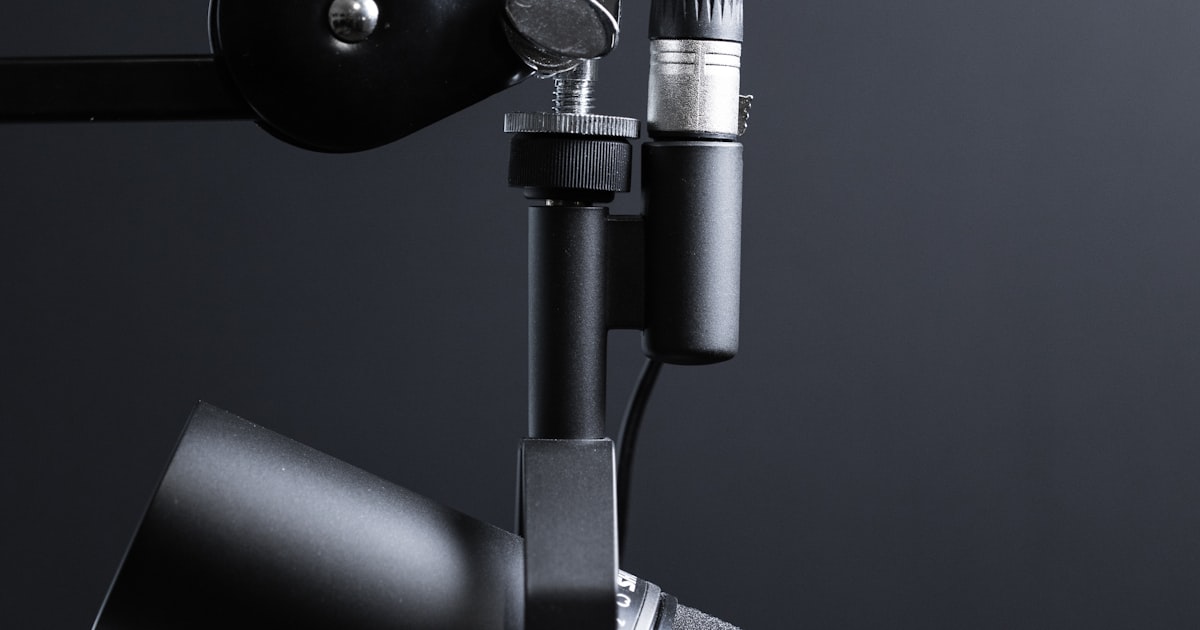
The Microphone: Where Your Money Actually Matters
Here’s the brutal truth about podcast microphones: the difference between a $50 USB mic and a $500 professional setup is smaller than the difference between any decent microphone and your laptop’s built-in mic. But within that range of “decent,” some choices are significantly better than others.
The Logitech Blue Yeti USB Microphone sits right in the sweet spot of performance, ease of use, and value. It’s the microphone you see in probably 60% of successful podcasts, not because podcasters lack imagination, but because it consistently delivers professional results without requiring a degree in audio engineering.
What makes the Blue Yeti special isn’t just sound quality – it’s the multiple pickup patterns. The cardioid pattern focuses on your voice while rejecting background noise from behind and beside the mic. The stereo pattern works great for recording two people with one microphone. And if you ever want to record a group discussion, the omnidirectional pattern captures everyone in the room.
The built-in headphone monitoring lets you hear exactly what you sound like in real-time, which is crucial for maintaining consistent distance and vocal energy throughout a recording session. Most people sound completely different than they think they do, and monitoring helps you adjust.
The Acoustic Treatment You Can’t Avoid
This is where most beginner podcasters fail spectacularly. They buy an expensive microphone, plug it into their laptop, and record in their kitchen with hardwood floors and granite countertops. Then they wonder why they sound like they’re podcasting from inside a concrete bunker.
Room acoustics matter more than microphone choice. A decent microphone in a well-treated space will always sound better than an expensive microphone in an echo chamber.
The easiest fix? Record in your bedroom closet. All those hanging clothes act as acoustic treatment, absorbing reflections and creating a naturally dead acoustic space. Bring in a small desk or TV tray, and you have a surprisingly professional recording environment.
If closet recording isn’t practical, you need to add absorption to whatever space you’re using. Heavy curtains, thick blankets, or even recording with a blanket fort setup can dramatically improve your audio quality. The goal is to eliminate hard surfaces that create echo and reverberation.
Headphones That Don’t Lie
Your consumer headphones are lying to you about how you sound. Those Beats or AirPods are designed to make music sound exciting, with boosted bass and enhanced highs. That’s great for entertainment, but terrible for evaluating podcast audio, where you need to hear exactly what your voice sounds like with no flattering EQ.
Professional monitor headphones give you an accurate representation of your recording. They’re not as fun for music listening, but they’re essential for catching audio problems that consumer headphones mask.
The key is closed-back headphones that isolate you from room noise and prevent audio from bleeding out of the headphones back into your microphone. Open-back headphones sound amazing but are useless for recording because they leak audio in both directions.
For more audio equipment options:
- Best podcasting microphones for detailed microphone comparisons
- Best noise-canceling headphones for monitoring options
- Best work headphones for extended session comfort
Recording Software: Free Is Actually Good Enough
Don’t spend money on recording software until you know exactly what features you need that the free options don’t provide. Audacity is free, open-source, and has every feature most podcasters will ever need. GarageBand (Mac) and Reaper ($60, free 60-day trial) are other excellent options that won’t break the bank.
The learning curve for audio editing software looks intimidating, but for podcast production, you only need to master a few basic operations:
- Recording and basic playback
- Cutting and moving audio clips
- Adjusting volume levels
- Noise reduction (built into most modern software)
- Export to MP3 format
These fundamentals will handle 95% of podcast editing needs. Advanced techniques like multiband compression and spectral editing are nice-to-have skills, not essential ones.
The Video Component (Because Everyone Expects It Now)
Whether you like it or not, podcast audiences increasingly expect video versions. YouTube is the second-largest podcast platform, and even audio-only shows benefit from having video content for promotion and discoverability.
The good news is that podcast video doesn’t need to be cinematic. People are usually listening while doing other things, so the video serves more as visual confirmation than entertainment. A simple, clean setup with good lighting often works better than elaborate multi-camera productions that distract from the conversation.
A decent webcam positioned at eye level, with a simple backdrop and front-facing lighting, creates professional-looking video that supports rather than competes with your audio content.
For video equipment recommendations:
- Best webcams for video podcast setups
- Best ring lights for flattering lighting solutions
Recording Workflow That Actually Works
Consistency beats perfection in podcasting. It’s better to have a simple workflow you follow religiously than a complex system you abandon after three episodes.
Pre-Recording Checklist:
- Test all equipment before guests arrive
- Set audio levels with everyone talking at normal volume
- Record a 30-second test and play it back to catch issues early
- Have backup plans for common problems (internet issues, software crashes)
During Recording:
- Monitor audio levels throughout the conversation
- Take notes on timestamp markers for editing reference
- Record longer than you think you need – you can always cut, but you can’t add back
Post-Recording:
- Save raw files immediately with clear naming conventions
- Do a rough edit pass while the conversation is fresh in your memory
- Create a consistent file structure for easy project management
Common Recording Mistakes That Kill Quality
Mistake #1: Recording in mono when you have multiple people. Always record each person on a separate track, even if you’re using one microphone. This gives you control over individual levels and the ability to edit out interruptions or background noise from specific speakers.
Mistake #2: Setting levels too high to avoid “low volume.” Digital recording doesn’t work like analog tape – there’s no benefit to recording hot, and you lose the ability to recover if someone gets loud unexpectedly.
Mistake #3: Over-editing. Removing every “um” and natural pause makes conversations sound robotic. Edit for pacing and clarity, not perfection.
Mistake #4: Ignoring room tone. Record 30 seconds of “silence” in your recording space at the end of each session. This background noise can be invaluable for smoothing edits and covering awkward cuts.
Remote Recording Solutions
Recording remote guests presents unique challenges, but it’s manageable with the right approach. The key is controlling what you can (your side of the conversation) and having backup plans for what you can’t (their audio quality and internet stability).
Record your side locally in high quality, and use remote recording tools for the other participants. Even if the remote audio isn’t perfect, having your side in pristine quality makes the overall conversation much more listenable.
Have backup communication methods ready. If the primary recording platform fails, you want to be able to quickly switch to an alternative without losing momentum or your guest’s time.
Content Strategy for Audio
Great podcast content works differently than written content or video content. People consume podcasts while doing other activities – commuting, exercising, doing chores – so the content needs to work when people aren’t giving it their full visual attention.
Conversational Pacing: Slower than you think. Leave pauses for emphasis and comprehension. People need processing time for complex ideas when they can’t see visual cues.
Clear Transitions: Verbally signal topic changes and segment breaks. Listeners can’t skim ahead or back up easily like they can with text.
Descriptive Language: Paint pictures with words since listeners can’t see what you’re referencing. Don’t assume shared visual context.
Building Your Podcast Brand
Audio-first content requires different branding considerations than visual media. Your voice, consistent intro/outro music, and verbal presentation style become your primary brand elements.
Invest time in developing a natural-sounding but distinctive vocal delivery. Practice reading your intro until it sounds conversational rather than scripted. Your voice is literally your brand in podcasting.
Consistent audio branding – intro music, segment transitions, background elements – helps create professional polish and listener expectations. But these elements should support the content, not distract from it.
Equipment Upgrade Paths
Start simple and upgrade based on actual problems rather than theoretical improvements. The biggest quality jumps come from solving specific issues: room acoustics first, then microphone quality, then recording/editing workflow improvements.
Phase 1: Single USB microphone, decent closed-back headphones, free recording software, basic acoustic treatment.
Phase 2: Better room treatment, upgrade to XLR microphone with audio interface for multiple inputs.
Phase 3: Professional monitoring equipment, dedicated recording software, advanced acoustic treatment.
Phase 4: Multiple microphone setups, backup recording systems, professional editing workflows.
Most successful podcasts never get past Phase 2. The content and consistency matter more than having the most advanced setup.
What We Recommend
After testing dozens of podcast setups and working with creators from beginners to professionals, here’s our proven starter configuration:
Essential Audio Foundation:
- Logitech Blue Yeti USB Microphone - Professional sound without the complexity
Complete Your Podcast Studio:
- Best podcasting microphones - Compare all recording options
- Best webcams - Video podcast equipment
- Best ring lights - Professional lighting solutions
- Best noise-canceling headphones - Monitoring and editing headphones
- Best work headphones - Comfort for long editing sessions
The most important advice for aspiring podcasters: start before you feel ready. You’ll learn more from producing ten imperfect episodes than from spending months researching the “perfect” setup.
Your first episodes will sound amateur compared to what you’ll produce after six months of regular recording. That’s normal and expected. Every successful podcaster started with awkward pacing, uncertain vocal delivery, and technical mistakes.
The goal isn’t to sound like a radio professional on episode one. It’s to consistently create content that gradually improves while building an audience that grows with you. Focus on having interesting conversations, solving real problems, or telling compelling stories. The technical polish will develop naturally as you gain experience.
Most importantly, remember that people choose podcasts based on content and personality, not audio engineering excellence. A slightly imperfect recording of genuinely engaging content will always beat technically perfect audio of boring conversations.
Start recording, start learning, and start building the audience that’s waiting to hear what you have to say.
Related articles

Products for Newsletter Writers: Tools for Writing, Editing, and Publishing
Essential equipment and tools for newsletter writers and content creators. From keyboards and monitors to desk lamps and ergonomic chairs - build the perfect writing workspace.
Home Studio Lighting Guide: Softboxes, Ring Lights, and LED Panels Compared
Complete guide to home studio lighting for photographers and content creators. Compare softboxes, ring lights, LED panels, and light stands to build the perfect setup for any budget.
Instagram Photo Products: Take Scroll-Stopping Photos at Home
Complete guide to taking professional Instagram photos at home. From ring lights and tripods to phone lenses and backdrops - create stunning content that stops the scroll.